After much dithering, I've broken down and bought some server space for a website. I'm moving the blog to the new site, and I'll be able to put up files for projects as well. The new blog is at http://www.velociengineer.net/.
This gives me even more incentive to keep the blog updated, so with luck you'll see more activity as I prepare things for Bayou Wars.
Sunday, March 4, 2012

Sunday, February 5, 2012
Ship bases: group photos


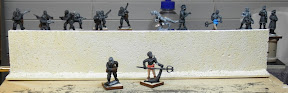
Next in the queue, marines from Pulp Figures. I'll post next Sunday with what progress I've made.
Sunday, January 29, 2012
Ship bases: painting
I trimmed up the edges of the bases with a knife, then started painting. Pick a base color and several highlights. I started with a bright blue, covering the texturing on the base top. Also paint the plastic along the edges of the texturing, to make sure none of the white base shows next to the ship.


Sunday, January 22, 2012
Ship Bases
I wanted some nice bases for the Uncharted Seas ships I painted up. Like everything else I do, I looked for a method I could steal rather than trying to figure it out for myself. While poking around, I found some very nicely done ships on the Lead Adventure forums, and a (very) brief description of how the bases were made. Here I show how I copied the idea.
First, materials. You'll need something to serve as the base; I used 0.040" styrene sheet because I had it, but you could use any material you can cut to size and won't warp when glue is applied. You'll also need white (PVA) glue and toilet tissue, torn or cut into small pieces. I used a sculpting tool and a pair of tweezers to apply the glue and tissue to the base, but anything convenient should work.

Naturally, you need a ship to base. I wanted about 5mm of exposed base around the ship, so I added 10mm to the length and width of the model; for this ship, that came out to 33mm x 77mm. I cut a piece of styrene to size and lightly tacked the ship in place with a few dots of white glue. You will remove the ship later, so don't do anything permanent here. The lines are 5mm from the edges, and are just guides I used to ensure I had the ship centered and straight.

(Here I've tinted my glue blue so it is visible; white base, white glue and white paper do not make for good photography.) Spread a thin layer of neat PVA glue on the base, being careful to keep it off the ship. Start placing pieces of tissue on the glue, using your tools to tuck it down on the base until it sticks in place. Don't worry if it overhangs the edge, you can trim it up with a sharp knife once the glue dries.


Once the tissue has been stuck in place, put a thick layer of glue on top of it. This will quickly soak the tissue through and break up the fibers in it.

Using a sculpting tool of some sort, push the tissue and glue into a wake shape drawing off from the edges of the ship. Start at the back of the ship, and push the tissue toward the back to raise up the waves. If you keep the edge of the tool at the bottom of the wave, the top of the wave should angle forward like it's crashing over.

At the bow of the ship, push the "water" up against the hull so it is rolling off and forward, and extend the wave off the edge of the base to the side. Then do the same for the other side of the ship.


Give it a few hours to dry, then carefully remove the ship from the base. If you got too much glue on the ship and wait too long to remove it, part of the sculpted water may come up from the base. Just add a bit of glue under the part that came loose and hold the water in place as you remove the ship.

Once it has dried thoroughly, I'll paint it. I'll show how that goes in my next post.
Sunday, November 20, 2011
What have I been up to?
The answer is, not much of anything. Various things have kept me from the painting table, and so I haven't had much of anything to say here. But now I've made some progress on some projects, so here we go again.
 Here I have a test paint of a Dwarven ironclad for Uncharted Seas, which Ed got me interested in recently. Behind it are the other two cruisers from the Dwarf starter set, waiting for drybrushing and detail work. Once they're clearcoated I plan to use dot filters on the metal armor panels to make them subtly different. I expect it to work, but we'll see. I have some destroyers and a battleship (the rest of the starter box) to follow these, and an Imperial starter box to paint up as well. I want to make sculpted water bases for the ships, which will be a new thing for me.
 Next up are Rebel Minis' Earth Force Marines, done up in a desert/scrubland scheme. The four sticks in front are done, the fifth stick needs a wash, and the heavy weapons and sniper teams in back are just basecoated. This is about half the pack, I have eight more sticks that aren't in the picture. Four (including the ones pictured) are basecoated, two just need washes, so I should be done with these pretty soon.
 I finally figured out how I will base my 6mm Seven Years War figures: 20mm x 25mm bases from Litko, with figures based three ranks deep on a stand. I plan to use these with the Batailles de l'Ancien Régime rules, to see how the table looks with something closer to a 1:1 figure scale. This will actually come out to 1:4, at 1:1 a battalion would be unmanageably big in 6mm, stretching four feet across the table. Doesn't someone make 2mm 7 Years War figures? :)
 One regiment; I've got notes around here somewhere saying who these guys are supposed to be, but I don't remember off the top of my head, other than Prussian. I'll find them again when I don't need them, or the painting notes that are with it. Each of these stands will count as three figures in BAR, and casualty rings or markers of some sort will mark stands with partial casualties.
 The unit's flagbearer and drummer, or at least one of them. There's one more stand on loan to Jay, who wanted to paint up the French figures I bought along with these. All of these figures are by Baccus 6mm.
 A cavalry squadron of 12 stands, each stand counting as a single cavalry figure in BAR. I'm not entirely happy with the horses, the greys and bays may get pulled out and repainted. Basing was simple: I glued the figures to the Litko base, then glued down sand to smooth the bases up to the strips. I painted it all with brown ink, then glued on a mix of Woodland Scenics earth blend and green blend flock. I'll stick some static grass on soon, and hit it all with a thin layer of pva glue to lock the flock down.
 The cavalry banner, still awaiting paint. I'll probably find an appropriate banner image somewhere and print it on label paper rather than trying to paint anything that small by hand. Or maybe I'll print it on decal film and basecoat the banner white. I'm not sure yet.
 Artillery and crews in progress. I'll base each gun and crew as a single unit, I may have to go up to a 25mm square base to fit them all in place.
So that's where I'm at. I've got some plans for the future, and Jim and I are scheming on a Bayou Wars game that may require me to break out my Hirst Arts block molds in addition to painting up some more figures that have been waiting on the sidelines. And the Martians should see some more time on the workbench soon as well.
Wednesday, June 15, 2011
Post Bayou Wars
Another Bayou Wars has come and gone, and great fun was had by all. I have photos, but they are still on the camera. I'll post them once I've recovered a bit. I came out of it with one very important lesson: my game for next summer will be completely ready by Christmas! None of this frantically preparing the night before for me, I'll be done with months to spare. (I also have bridges for sale, cheap, just one owner.)
I have several projects to work on this summer and fall. My plan for Bayou Wars is a 6mm scifi game, part of a campaign of 6 games I hope to run for the club next year. I also want to get some more Aeronef painted up and build some more shipping vessels to go with it, and get enough figures painted for a playable Colonial Mars game. I have some plans for a gladiator game as well.
This week, though, is spring cleaning. I'm tearing down my painting desk (and much of the rest of the house) to clean and organize things, because it needs it badly.
I have several projects to work on this summer and fall. My plan for Bayou Wars is a 6mm scifi game, part of a campaign of 6 games I hope to run for the club next year. I also want to get some more Aeronef painted up and build some more shipping vessels to go with it, and get enough figures painted for a playable Colonial Mars game. I have some plans for a gladiator game as well.
This week, though, is spring cleaning. I'm tearing down my painting desk (and much of the rest of the house) to clean and organize things, because it needs it badly.
Monday, May 30, 2011
Archaeologists and Germans
It's been a couple months of slowly plonking away at figures as I find the time. But I've finally completed the archaeologists I'll need for Bayou Wars, as well as another unit of Zeppelin Troopen.


This week I want to build some hills, rocky outcroppings, and jungle vegetation to fill out the table. I also need a narrow trail that will cross the table; I can use my road pieces, but I want something less built-up, more like a track that's been hacked out of the jungle. We'll see how it comes out.
Monday, March 28, 2011
Rise of the Jurassic Reich!
I'm getting back into the swing of things after some unpleasant events. I'm still running my game Saturday, so I have some work to do this week. Since they'll be big and bright and the center of attention, I've started on my Kriegsclaw figures from Eureka.

Sure, they're just partly basecoated, but I like where they are going. We'll see how it turns out, and if I can get them close to done by Saturday morning.
Wednesday, March 9, 2011
Nothing much to say today.
I realized this weekend that the test play of my pulp game is in four weeks. I've got fortysome figures to paint (some still need to be purchased, even), terrain to build, game aids to make and scenario details to write up. I should have some interesting things to look at next week.
In the meantime, over on the Jackson Gamers blog there is a writeup of the Liftwood and Steam game I ran this weekend at my place.
In the meantime, over on the Jackson Gamers blog there is a writeup of the Liftwood and Steam game I ran this weekend at my place.
Tuesday, March 1, 2011
More photos of the zep troopen

I've been poking along at these guys. Still not happy with the bases, and the photos are still coming out squirrelly as well. But, here are some closeups. As usual, click on the photos for larger images.


Monday, February 21, 2011
A quiet week
I didn't get much done this week, just working on the shading and bases on the Germans and preparing some GZG starship minis for painting. I'll get pictures next week.
Sunday, February 13, 2011
Zeppelin Troopen

I've almost finished the Zeppelin Troopen soldiers. I need to do some highlighting, and a wash on the exposed skin, and work up the bases.


Painting was pretty straightforward. Charcoal grey uniforms, black boots, reddish brown for the leather, etc. I pulled out a new trick for the goggle rims. The lenses are light grey, with sky blue "reflections". I colored the frames using a Tombow pen with a brush tip. The very fine tip of the brush pen let me get just the edges of the frames without straying (much), and because it's a pen, I don't have to worry about paint consistency or overloading a brush. I bought the pens for edging on paper models like the Hummingbird, but I'm glad I had them around for this. There's a recent thread on TMP about using pens for outlining, and I'll have to see if these will be useful elsewhere.

Monday, February 7, 2011
Walling off the world
I spent much of the week building walls for Saturday's game... which didn't get used, because we rearranged things at the last minute and didn't need them. That's ok, I figured out enough throwing these together to do up a lot of them for later games.
The first set of walls were made from cork. I just cut 2" wide strips from a (almost) 12"x12" piece of cork tile and glued them onto 1" wide bases of hardboard, then worked the bases up with some filler. I painted them sand, then drybrushed with a cream color.
 (click for a larger picture)
The second set of walls were more complicated. I wanted to get some relief and structure in them, so I drew up some facings in a cad program (cadstd, a cheap and decent program for simple stuff like this) and printed them out on cardstock. One set of facings had rectangular openings, the other had arched openings. I carefully cut these out, then after a few I quit trying to be careful. :)

I glued the arched facings onto a piece of foamcore, then glued the rectangular facings over them. I glued each 2"x9.5" wall section to a hardboard base, then glued a half-inch balsa pillar at one end to make 10" sections. A quick coat of paint and they were usable. When I do these again, I want to put stonework on the tops of the walls and dress up the end pillars.
For this week, it's the Zeppelin troopen (again) and gladiators you can see in the background.
The first set of walls were made from cork. I just cut 2" wide strips from a (almost) 12"x12" piece of cork tile and glued them onto 1" wide bases of hardboard, then worked the bases up with some filler. I painted them sand, then drybrushed with a cream color.
(click for a larger picture)The second set of walls were more complicated. I wanted to get some relief and structure in them, so I drew up some facings in a cad program (cadstd, a cheap and decent program for simple stuff like this) and printed them out on cardstock. One set of facings had rectangular openings, the other had arched openings. I carefully cut these out, then after a few I quit trying to be careful. :)
I glued the arched facings onto a piece of foamcore, then glued the rectangular facings over them. I glued each 2"x9.5" wall section to a hardboard base, then glued a half-inch balsa pillar at one end to make 10" sections. A quick coat of paint and they were usable. When I do these again, I want to put stonework on the tops of the walls and dress up the end pillars.
For this week, it's the Zeppelin troopen (again) and gladiators you can see in the background.
Saturday, January 29, 2011
One step forward, two steps back
When I started painting up the Zeppelin troops, I discovered that the gesso had left a lot of bubbles and webbing, probably because the bottle was mostly empty and had dried out a bit. Fortunately, I've got a new bottle waiting. So they went in the drink (Simple Green) for a bit, spent some time under a brush, and are ready to be rebased and primed again.
That's life, I guess. I've been getting some other things ready to paint as well.
That's life, I guess. I've been getting some other things ready to paint as well.
Sunday, January 23, 2011
Clearing the workbench
This week I've been finishing up an old project, some more bocage for Crossfire, while getting my Pulp Figures zeppelin troopen ready for painting.

These were built as shown on This Very Blog. It's a quick and straightforward method, and looks good on the tabletop.

Balsa wood, sand and small rocks, Woodland Scenics trees and clump foliage, and GW static grass.

The zeppelin troopen are great figures, easily cleaned up. Here I've done my usual prep: black gesso for primer, followed with a heavy white drybrush.

Converting this guy was quite fun. When I looked at the guy on the top left here, he looked to me like a big burly type who should be lumbering around the battlefield firing a machine gun from the hip. So I took the guy on the right here, and hacked the gun out of his hands. I took an extra Maxim I had laying around and cut it down a bit to fit. Then I cut off their heads (muttering "Ach! Mein Kopf!" all the while, of course) and glued them on each others' bodies.

These were built as shown on This Very Blog. It's a quick and straightforward method, and looks good on the tabletop.
Balsa wood, sand and small rocks, Woodland Scenics trees and clump foliage, and GW static grass.
The zeppelin troopen are great figures, easily cleaned up. Here I've done my usual prep: black gesso for primer, followed with a heavy white drybrush.
Converting this guy was quite fun. When I looked at the guy on the top left here, he looked to me like a big burly type who should be lumbering around the battlefield firing a machine gun from the hip. So I took the guy on the right here, and hacked the gun out of his hands. I took an extra Maxim I had laying around and cut it down a bit to fit. Then I cut off their heads (muttering "Ach! Mein Kopf!" all the while, of course) and glued them on each others' bodies.
Friday, January 14, 2011
Papercraft: Mel Ebbles' Hummingbird
The past week I've been building another papercraft model, this time a Hummingbird attack skimmer for one of my 15mm scifi forces.
The model is designed to a 25mm (1/60) scale. To build it in 15mm scale, I simply scaled the print to 60% and printed it on photo paper that I cut down to 5.5" x 8.5". After that, I built it like normal. I found that the existing glue tabs did not work well at this size, but cutting off the existing glue tabs and making new ones from colored paper worked out fine. Some pieces ended up a little fiddly and hard to put together, especially the engine thrusters and intakes and the chin gun and sensor pods.

(Click on the images for larger pictures.)


The model is very lightweight. I was going to glue a washer inside the hull to give it some heft, but I forgot. The file includes patterns to make a flying stand, which I'll put together after I find the necessary transparency sheets. I am planning to glue that washer to the bottom of the model, and stick some magnetic sheet to the top of the stand so the model is easily removable.
No in progress shots, but here are the tools I used to cut out and build the model.

I did my cutting on a glass cutting board. That self-healing mat is under the glass, and I only put it there to give me some contrast for the brown bits of paper I was using for tabs. The white tool is a bone folder, used to crease the cardstock without cutting it. This lets the heavy paper bend much easier and in a more controlled manner; just drag it across a fold line like it is a knife.
The cutting was done with a snap-blade utility knife. Cutting on the glass goes through blades pretty quickly, and these are cheap but still sharp enough to get a good cut. The sculpting tool next to it I used to apply glue, and I used the tweezers to hold fiddly pieces while gluing and to clamp glue joins together until it set. I used the pen (and another brown one) to color exposed paper edges and the backs of pieces so the white bits don't show through.
At the top of the picture you can see leftover paper I used to make glue tabs. I just cut a 1/8" strip of paper, folded it in half lengthwise, and colored one side with a pen. I measured a join edge, cut the paper to length, then cut off the corners as needed so it would fit properly.
I glued it up with regular pva (Elmer's) glue. the blobs at the top right of the cutting board are where I dabbed small drops of glue before using the sculpting tool to apply them to the cardstock.
The model is designed to a 25mm (1/60) scale. To build it in 15mm scale, I simply scaled the print to 60% and printed it on photo paper that I cut down to 5.5" x 8.5". After that, I built it like normal. I found that the existing glue tabs did not work well at this size, but cutting off the existing glue tabs and making new ones from colored paper worked out fine. Some pieces ended up a little fiddly and hard to put together, especially the engine thrusters and intakes and the chin gun and sensor pods.
(Click on the images for larger pictures.)
The model is very lightweight. I was going to glue a washer inside the hull to give it some heft, but I forgot. The file includes patterns to make a flying stand, which I'll put together after I find the necessary transparency sheets. I am planning to glue that washer to the bottom of the model, and stick some magnetic sheet to the top of the stand so the model is easily removable.
No in progress shots, but here are the tools I used to cut out and build the model.
I did my cutting on a glass cutting board. That self-healing mat is under the glass, and I only put it there to give me some contrast for the brown bits of paper I was using for tabs. The white tool is a bone folder, used to crease the cardstock without cutting it. This lets the heavy paper bend much easier and in a more controlled manner; just drag it across a fold line like it is a knife.
The cutting was done with a snap-blade utility knife. Cutting on the glass goes through blades pretty quickly, and these are cheap but still sharp enough to get a good cut. The sculpting tool next to it I used to apply glue, and I used the tweezers to hold fiddly pieces while gluing and to clamp glue joins together until it set. I used the pen (and another brown one) to color exposed paper edges and the backs of pieces so the white bits don't show through.
At the top of the picture you can see leftover paper I used to make glue tabs. I just cut a 1/8" strip of paper, folded it in half lengthwise, and colored one side with a pen. I measured a join edge, cut the paper to length, then cut off the corners as needed so it would fit properly.
I glued it up with regular pva (Elmer's) glue. the blobs at the top right of the cutting board are where I dabbed small drops of glue before using the sculpting tool to apply them to the cardstock.
Subscribe to:
Posts (Atom)